


Now, I'm calling it a spinner card because I can't think of what else to call it. You may have seen this with another name but for now it'll have to remain a spinner card!
I think they are just perfect to compliment the new Dottie and George collection- Back To Front, what do you think?......

Cool eh? Here's how you can make one for yourself..... First of all you need to print out your front and back images and mount them onto two identical shapes (they need to fit together). All the cutting on my card is done on my Silhouette (digital craft cutter) If you don't have any fancy cutters it doesn't matter because it will be equally as effective with a rectangular aperture and spinning section.
I used a Cuttlebug Embossing folder for the textured white background.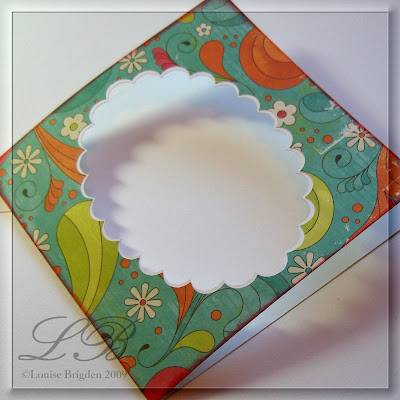
Prepare a card blank, covering it with your chosen patterned paper and cut an aperture slightly bigger than your centrepiece - the spinning section needs enough space to spin freely.
Take one of your mounted pictures and tape some thin craft wire down the middle, leaving around 2cm at each end. Now stick the two images securely back to back, sandwiching the wire in between. Add beads onto each end of the wire to act as spacers - check against the aperture of your card to see how much space you have for your beads.
 Open your card, lay your centrepiece in position and tape the wire securely onto the inside of your card as shown above. I've used clear tape but it would look better if you used a little scrap of the same card you used for your card base stuck down with double sided tape.
Now just add any finishing touches to the front of your card. I've just used some We R Memory Keepers chip board corners to decorate mine. The paper is from the We R Memory Keepers Nonsense range too.
Here's a better view of the reverse of the image...
 This kind of card would work well with any of the Back To Front images, you could try out some different shaped appertures too, how about a heart spinner for Valentines day? There is a fab image of Dottie and George that would work well for that - when you spun the picture it would reveal George pinching Dottie's bum! To check out the Back To Front downloads pop over to Charmed Cards and Crafts.
I hope you find this helpful, let me know if you have a go and I'll pop over for a look.
Louise xx


8 comments:
this is so clever im gonna try this watch this space lol
Gill
lou thats fab !You are such a clever lady ! I was just telling my friend yesterday about your new download - i think the phone call was cut short somewhat in an effort to go and get it quick ! lol
Brilliant tutorial Lou. These images are just perfect for this design.
Juliet xx
This is awesome
I so want to try this
I love spinner cards, but it was always hard to get images to look right. You've taken that problem away and given us the idea pictures. Thank you so much for that. wub xoxoxo
That is such a fantastic card. I'm going to have to give it a go.
Thanks for the tutorial on how to make it. Will be flipping back and forth to make sure I get it right.
Sallyxx
Louis, thanks for this tutorial. I must give this a try very very soon. I have left soemthing for you on my blog:
http://kyms-crafty-cards.blogspot.com/2009/01/your-blog-is-fabulous-award.html
Best wishes. Kym xxx
Thank you for the inspiration Louise! I have added a spinner card to my blog - I'd love for you to have a look and let me know what you think!
http://handcraftedbysuzib.blogspot.com/
Thank you!
Post a Comment